Welcome to Aletheia: your first few minutes in the platform
This guide gets you logged in, oriented on your dashboard, and ready to create your first event.
Step 1: Logging in
- Open your browser. Aletheia works in Chrome, Safari, Firefox, Edge. Go to your organization’s Aletheia login URL OR enter preview.aletheia.events if you don’t have one yet.
- Enter your credentials. Enter your work email and click Continue, or click Continue with Google if that’s how your team signs in.
- Land on your dashboard. Once you’ve signed in successfully – you are ready to start using Aletheia.
First time logging in? Accept the email invitation from Aletheia and set your password before you start.
Forgot your password? Click Forgot password on the login screen to reset it.
Tip: Your login steps might look different depending on how your organization sets things up (password vs. a two-factor code). Your welcome email has the specific URL and sign-in method for your team
Step 2: Get to know your events dashboard
Once you’re in, you land on your Events Dashboard — think of it as home base. Every event you have access to lives here, and it’s worth spending 30 seconds getting familiar with what’s on the screen:
| What you see | What it does |
|---|---|
| Workspace name (left sidebar) | Tells you which workspace you’re currently in |
| Event summary cards | Quick snapshots of active, past, archived, and total |
| Current / Past / Archived tabs | Filters your event list by lifecycle stage |
| Event card | Click into any event — shows name, status, dates, and venue at a glance |
| + New event button (top-right, blue) | Creating a new event workspace |
That’s the button you click next.
Step 3: Create your first event
Ready to build something? Here’s all it takes:
- Click + New event in the top-right corner of the workspace card.
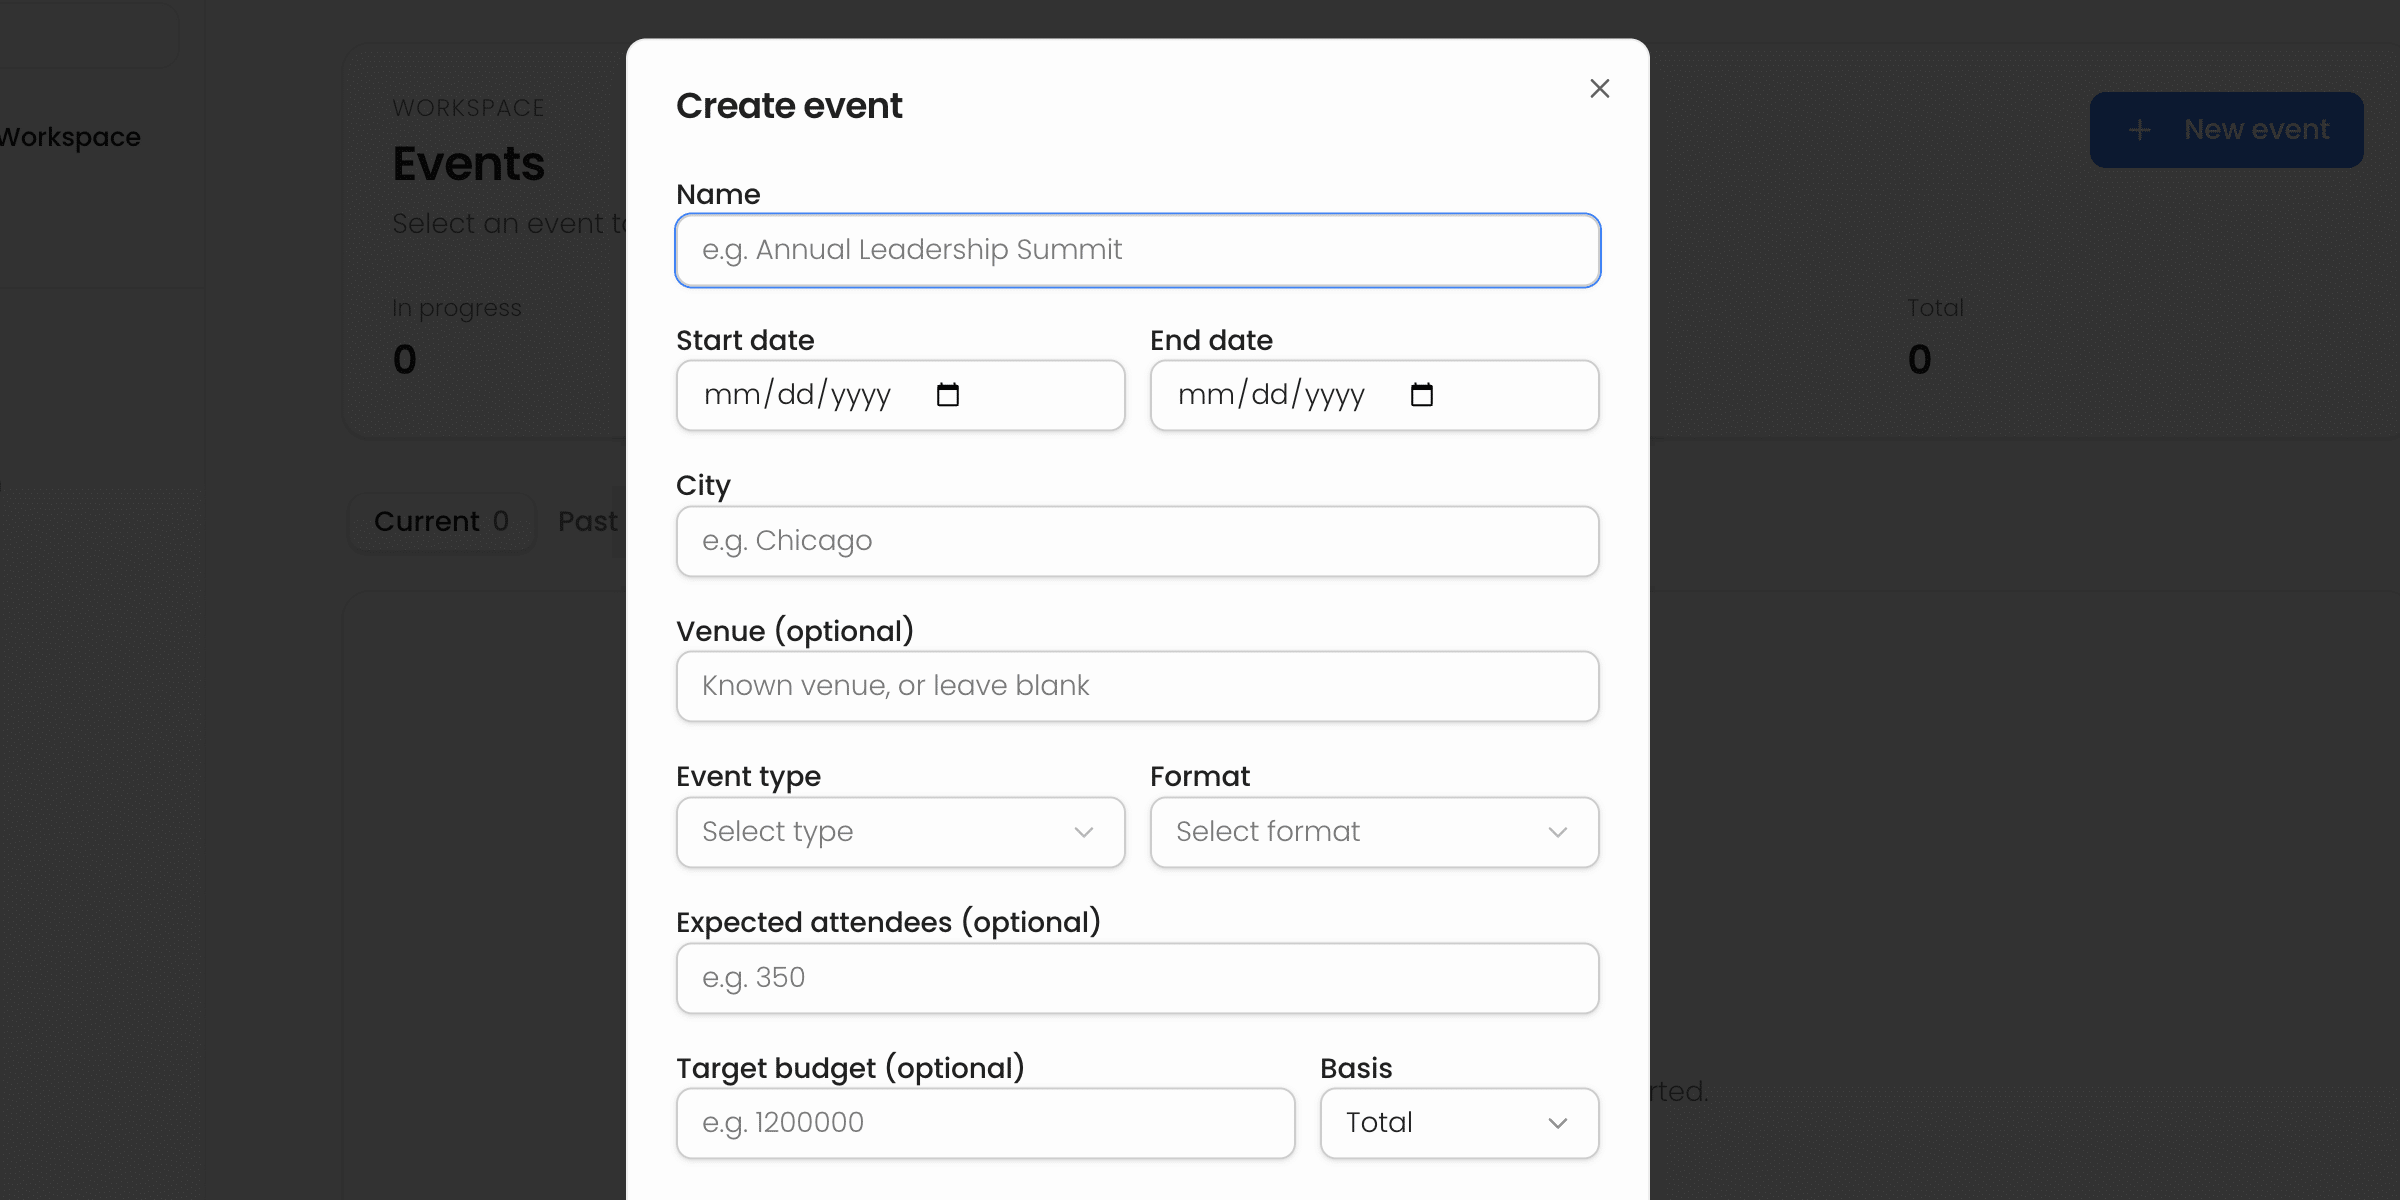
- Fill in the essentials. Aletheia only requires five things to get started — name, start and end dates, city, event type, and format. Everything else (venue, expected attendees, target budget) is optional, and you can always fill it in later.
- Click Create. Aletheia builds out your event workspace and drops you into the Event Dashboard, ready to go. New events start in Draft status, so there’s no pressure — you’re just setting the stage.
Here’s a closer look at what goes into each field:
| Field | What to enter |
|---|---|
| Name (required) | The full event name — e.g., Annual Leadership Summit |
| Start & End dates (required) | MM/DD/YYYY format |
| City (required) | Host city — e.g., Chicago or Atlanta |
| Event type (required) | Category, like User conference or Sales kickoff |
| Format (required) | In person, Virtual, or Hybrid |
| Venue (optional) | Add it once you’ve got a signed contract |
| Expected attendees (optional) | Your working headcount target |
| Target budget (optional) | Your budget envelope, if you already know it |
From here, the next step is exploring the modules inside. Budget, timeline, and team modules are all accessible from the left navigation bar.
Quick recap: Log in → get oriented on your dashboard → create your first event. Three steps, a few minutes, and you’re officially set up in Aletheia.
Step 4: A tour of the modules
Once you’re in, you’ll notice Aletheia is organized by module. How much you can do in each one depends on your organization’s plan and individual team member access. The modules you own become full working tools, while the rest show you a synthesized view of files you’ve uploaded, high-level metrics, graphs, and tasks (where applicable).
| Module | What it does for you |
|---|---|
| Event Dashboard | Your event’s single source of truth. Connect or upload your files: registration exports, agendas, speaker lists, budgets, hotel proposals, and more. Aletheia pulls them together into one live, presentation-ready view you can share with leadership. |
| Budget | Carries your budget through three stages: Build (build and compare scenarios in the Budget Playground), Track (track vendors, contracts, and invoices against approved numbers), and Reports (top spend drivers, AI insight cards, and shareable analysis). |
| Timeline | Build and run your event workback plan generated from a hotel contract, your event dates, or last year’s plan and keep it synced as your team works towards the event. |
| Teams | The control layer. An admin adds members, assigns roles, and grants each one exactly the access it needs. |
YOUR FILES STAY THE SOURCE OF TRUTH
Everything on the Event Dashboard is synthesized from source files you provide. Re-upload a newer version of a file and its section refreshes to match; connect a cloud source like Google Drive and it pulls the latest version automatically.
Step 5: Aletheia’s Add-On Modules
| Module | What it does for you |
|---|---|
| Food & Beverage | Build out your food and beverage plan in a cost grid that matches menus, dietary needs, and pricing to your budget automatically. |
| Venue | Run your venue search from RFP generation, and proposal comparison to contract analysis. |
| Timeline | Build and run your event workback plan generated from a hotel contract, your event dates, or last year’s plan and keep it synced as your team works towards the event. |
| Digital Playbook | Turn your event details into a polished, branded playbook you can generate and share with stakeholders. |
| Speakers | Keep your speaker roster, forms, and session assignments organized in one place, from outreach through show day. |
| AV | Consolidates your AV requirements and vendor quotes by room and session. |
| Revenue | Tracks sponsorship, ticketing and other income against your targets, giving you a live view of what’s booked versus what’s still open. |
YOUR FILES STAY THE SOURCE OF TRUTH
Everything on the Event Dashboard is synthesized from source files you provide. Re-upload a newer version of a file and its section refreshes to match; connect a cloud source like Google Drive and it pulls the latest version automatically.
Step 6: Your next steps
You’re all set up. From Here:
1. Get started with budget – see Getting started with budget for a closer walkthrough
2. Event dashboard – see event dashboard overview for more details